Set up a small practice space
Embroidery is easier to learn when your first goal is a sample, not a finished gift. Choose a piece of plain, closely woven cotton large enough to hold comfortably. You will also need an embroidery needle, embroidery floss and scissors. A small hoop can keep the fabric steady, but you can begin without one if the fabric does not bunch up as you stitch.
Draw three short lines on the fabric with a pencil, using a light touch so the marks will not dominate your stitches. Keep each line a few inches long. Cut a length of floss roughly as long as your forearm; a longer piece may twist or tangle while you work. Embroidery floss usually separates into thinner strands. Try two or three strands together for a line that is visible without being bulky. Knot one end to begin your practice.
Try the running stitch first
The running stitch makes a broken line, much like a row of dashes. Bring the needle up through the fabric at the start of your first drawn line. Move a short distance forward, push the needle down, then bring it up again a similar distance farther along. Continue to the end of the line, making the visible stitches and the spaces between them roughly even.
Do not worry about perfect spacing. Instead, notice how your hands control the fabric: one hand guides the needle while the other keeps the fabric flat. If the fabric puckers, you may be pulling the thread too tightly. Ease the next stitch into place so it lies on the surface without drawing the cloth together. Running stitch works well for borders, trails and small decorative details.
Use backstitch for a continuous outline
Backstitch is useful when you want a solid-looking line. Bring the needle up a short distance from the start of your second drawn line. Insert it back at the start, then bring it up one stitch-length ahead of where you first came through. Insert the needle at the end of the previous stitch. Repeat that pattern: come up ahead, then go back to meet the stitch you just made.
This movement may feel less intuitive than running stitch, so work slowly at first. Aim for short stitches of similar length, especially if the line curves. You can turn the fabric in your hands as you go rather than forcing your wrist into an awkward angle. Backstitch can outline a leaf, trace a letter or connect the parts of a small drawing.
Add a little color with satin stitch
Satin stitch fills a shape with parallel stitches. Draw a small oval beside your practice lines; a narrow shape is more manageable than a wide one. Bring the needle up at one edge of the oval and take it down at the opposite edge. Bring it up beside the first stitch and repeat, placing the stitches close together until the fabric inside the outline is covered.
Keep the stitches gently snug, not stretched tight. If a gap appears, you can add another stitch rather than pulling nearby ones sideways. For your first attempt, focus on covering the shape neatly rather than making every stitch identical. Satin stitch takes more thread and attention than a simple line, so one or two small shapes are plenty for a short practice session.
Turn your sample into a first project
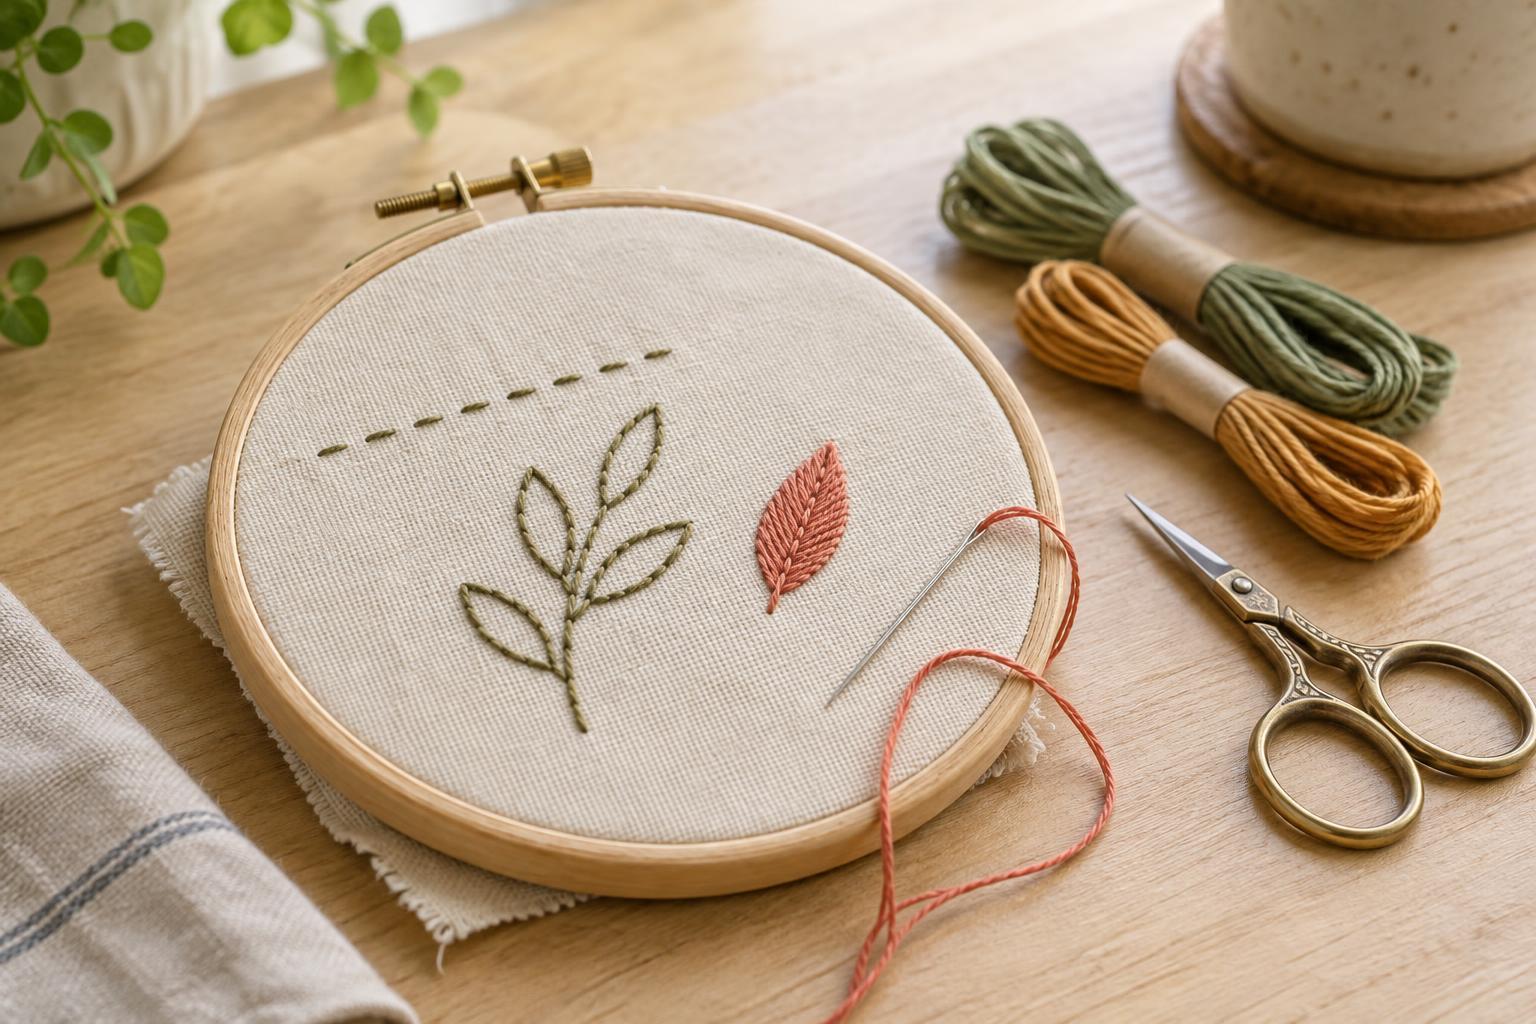
Once you have tried all three stitches, sketch a tiny design that uses each one for a purpose. A sprig is a manageable choice: use backstitch for the stem, running stitch for a dotted border and satin stitch for two small leaves. Keep the drawing loose and leave space between its parts. You are practicing how stitches behave together, not testing whether you can reproduce a picture exactly.
When you finish a length of thread, take the needle to the back of the fabric and pass it beneath a few existing stitches to secure it, then trim the end. Look at both sides of your sample before putting it away. The front shows what you made; the back can reveal where thread tangled or traveled farther than necessary. Save the sample as a reference, and make your next small design with one adjustment you would like to practice.