Start with a clear plan and a stable surface
Before reaching for a saw or drill, decide what the finished piece needs to fit. A shelf cut to length, for example, may need to sit between two walls that are not perfectly parallel. Measure the actual opening where the shelf will go rather than relying only on a sketch. If you have several similar pieces, label them so their measurements do not get mixed up.
Set the material on a stable work surface with good light. Identify one straight, reliable edge and use it as your reference for the rest of the layout. Measuring each new mark from the same edge helps prevent small differences from accumulating. If the edge is rough or uneven, choose another reference or establish a straight line first. Keep a pencil, tape measure, square, and a scrap piece of paper nearby so you can record dimensions instead of trying to remember them.
Measure once from the reference, then verify
Hold the tape flat against the material and look straight down at the mark you are reading. A hooked tape end is useful, but check that it catches cleanly; a loose grip or an angled tape can shift the reading. For short, detailed layouts, a rigid ruler may be easier to control. Mark the intended dimension with a small, sharp pencil tick rather than a broad stroke.
Before extending that tick into a line, check it against your plan and measure again. On a rectangular piece, you can measure from both ends as a reasonableness check: the two distances should add up to the overall length. For repeated cuts, measure each piece from your original reference rather than from the end of the previous cut. If a dimension seems surprising, pause to confirm the units and the finished orientation of the piece.
Draw lines that tell you where the tool goes
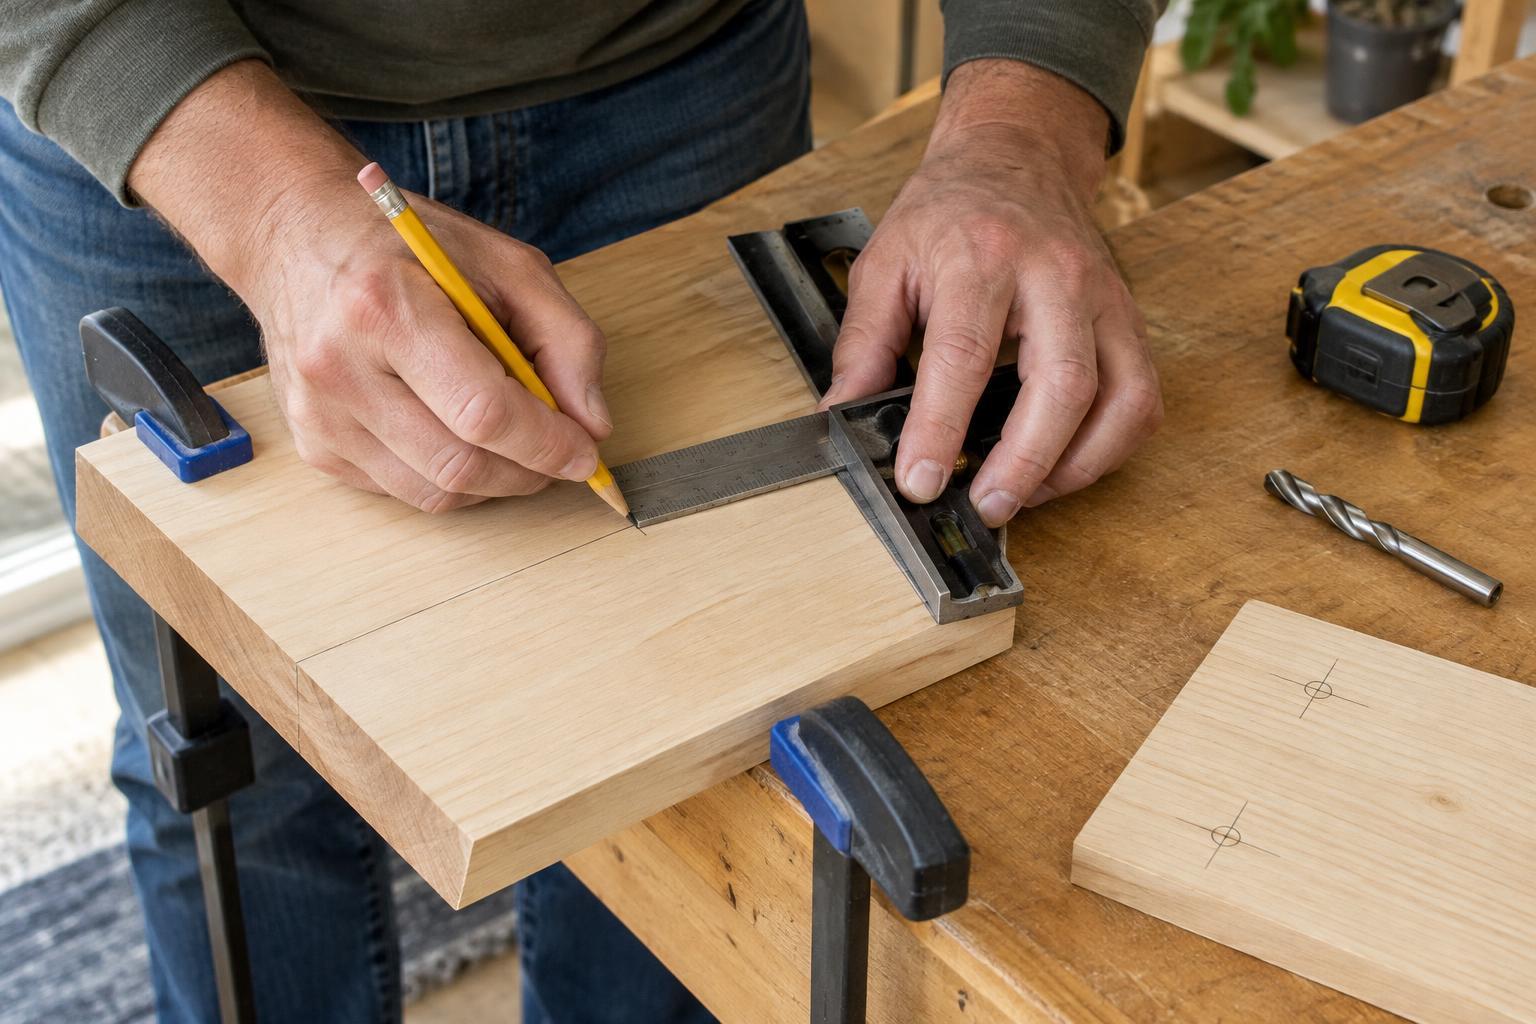
A small tick identifies a point; a square turns it into a useful cutting line. Place the square firmly against your reference edge and draw across the face of the material. If you need the line on another face, carry it around the corner with the square instead of guessing where it continues. Mark the waste side with an X so you do not accidentally remove the part you meant to keep.
A saw removes material as it cuts. When the finished size matters, position the cut on the waste side of your line, accounting for the width of the blade. Keep the line on the piece you are saving when that makes it easier to see your target. For a tight fit, it is often easier to leave a little extra material and trim or sand it than to correct a piece cut too short. Check the saw’s instructions and your setup before cutting; the pencil line is a guide, not a substitute for controlling the tool.
Mark drilling locations from consistent edges
For a hole in a board or panel, measure its position from two reference edges. Make small ticks at both dimensions and use a square to draw light crossing lines. Their intersection gives you a clearer target than a large pencil dot. If you are making a pair of matching pieces, label their front, back, top, and bottom before transferring measurements. That simple step helps prevent a hole pattern from being mirrored by mistake.
If a hole needs to pass through the material, put a scrap board underneath when appropriate to support the exit side and protect the work surface. Clamp the work securely rather than holding a small piece by hand. You can test bit placement against the mark while the drill is off, then move your hands clear before starting. For deeper holes that must stop at a set depth, use a depth stop suited to the drill or a clearly visible mark on the bit, and check the depth as you work.
Do a final check before committing
Read the marks as if someone else made them. Which side is the finished piece? Is the cut square or angled? Are the hole positions measured from the correct face? Dry-fit parts where possible, and compare matching pieces side by side. A few minutes spent checking now is usually less frustrating than remaking a part later.
Walls require extra caution. Before drilling, consider what may be behind the surface, including wiring and pipes, and follow the instructions for any detector or mounting hardware you use. If you cannot establish that a location is suitable, do not drill there. For any cut or hole, secure the material, use appropriate eye protection, and follow the tool manufacturer’s guidance. Accurate marking gives you a better starting point; a deliberate setup helps you turn those marks into the result you intended.