Start with one drawer and a simple plan
A crowded drawer is a good candidate for a short weekend project. Cardboard dividers can give socks, stationery, craft supplies or other lightweight items their own spaces without permanently changing the drawer. Start with one drawer rather than trying to organize a whole room. Empty it, wipe it out if needed, and group its contents by type. Set aside anything that belongs elsewhere.
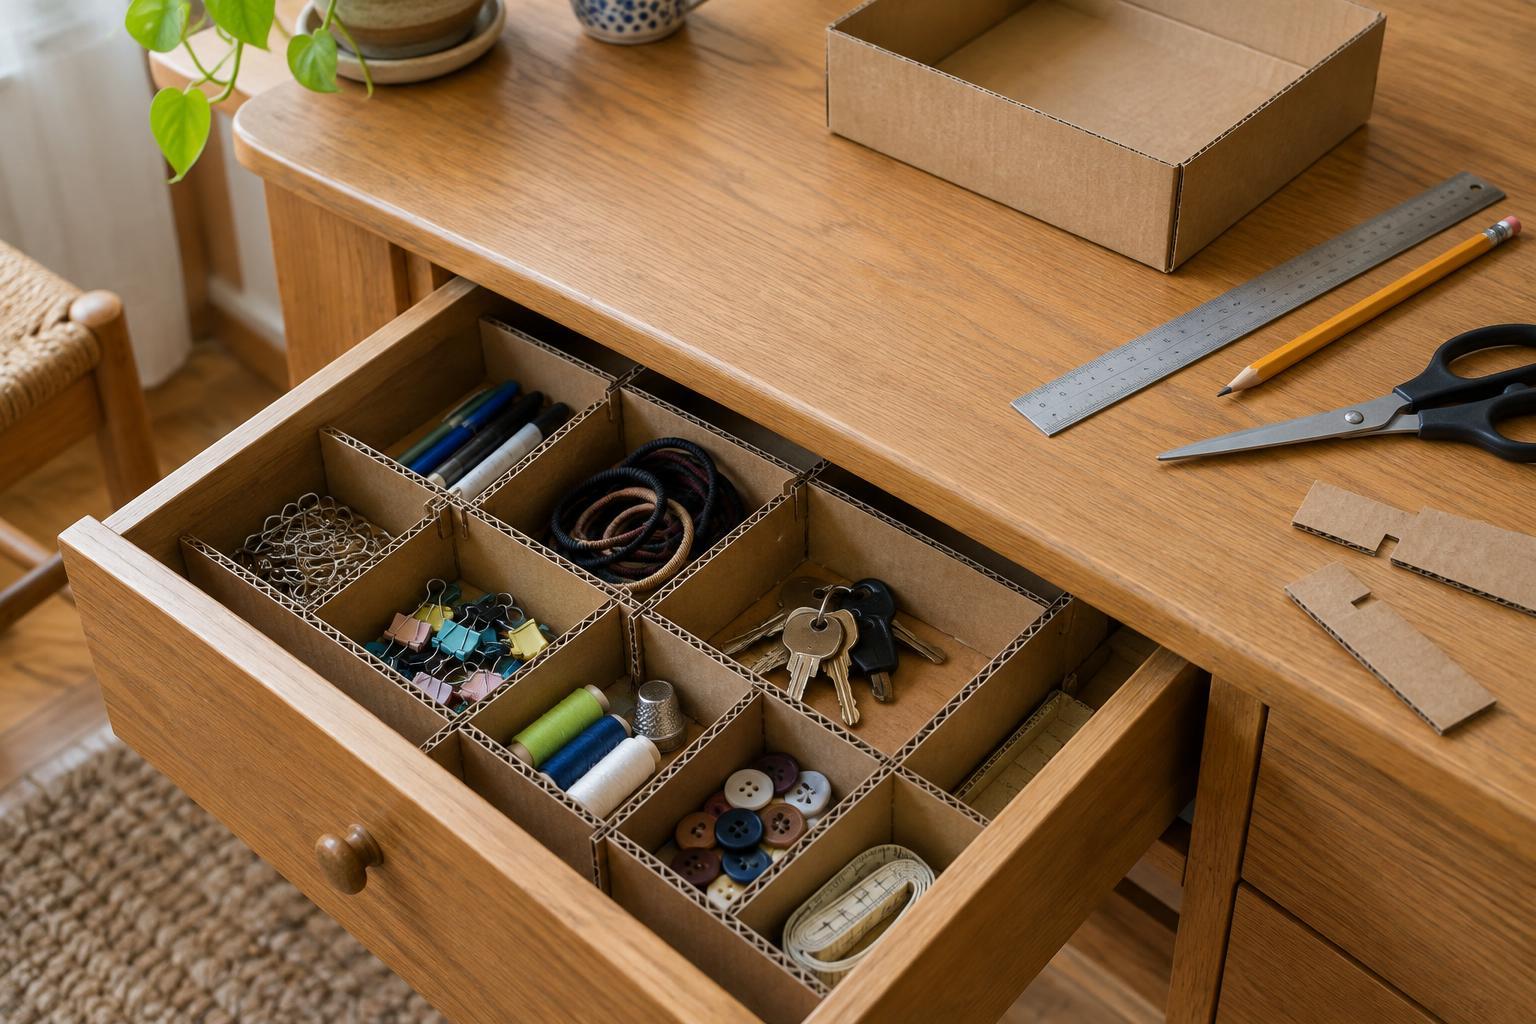
Before cutting, decide how many compartments would be useful. A few generous spaces are usually easier to use than a grid of tiny ones. Place the items back in loose groups to see where divisions might help, then sketch a rough layout. It does not need to be perfectly symmetrical: a long space for pens can sit beside shorter spaces for clips or sticky notes. Keep anything you reach for often easy to see and grab.
Measure for a comfortable fit
Measure the inside width, front-to-back depth and usable height of the empty drawer. Check for corners, rails or handles that may affect where the dividers can sit. If the drawer has a low opening, leave enough space above the cardboard for it to slide freely. Record the measurements on your sketch, along with the approximate positions of the compartments.
Choose firm, clean cardboard from a shipping box or another sturdy package. Flatten it and avoid pieces that are damp, badly creased or coated with residue. You will also need a ruler, pencil and scissors. Tape can reinforce joins or cover rough edges. For thick cardboard, a craft knife may make cutting easier, but use it only on a suitable cutting surface and with appropriate care. Scissors are sufficient for many thin cardboard boxes.
Cut and connect the divider strips
For a basic grid, cut one or more long strips to run from front to back and shorter strips to run from side to side. Make each strip slightly shorter than the drawer dimension it follows so it can be lifted out without catching. Cut all strips to the same height, a little below the drawer’s usable height. If the cardboard bends easily, orient each strip so its stronger direction runs along the length where possible, or use two layers joined with tape.
To connect two strips, mark where they should cross. Cut a slot down from the top edge of one strip to about its halfway point. On the crossing strip, cut a matching slot up from the bottom edge to about halfway. Make each slot only wide enough to accept the cardboard; widen it gradually if necessary. Slide the slots together so the top edges sit at roughly the same height. Repeat at the other crossings. If slots feel fiddly, you can instead arrange the strips in the drawer and tape the joins, though that version may be less convenient to rearrange.
Test the layout before filling it
Lower the assembled grid into the empty drawer and open and close the drawer gently. If a strip bows, trim a little from its length rather than forcing it into place. If the grid shifts more than you would like, adjust a compartment width or add a small piece of tape at a join. Avoid attaching the cardboard to the drawer itself until you are sure you want a fixed layout; a removable grid is easier to clean around and change later.
Now return the contents, one group at a time. Try using the drawer for a few days before making more precise cuts. You may find that one compartment needs to be wider or that two small spaces work better as one large one. Cardboard makes those changes simple: replace a strip, move a crossing point or cut a fresh piece from your leftover box.
Keep the dividers useful over time
Cardboard works best for dry, lightweight contents. For items that may leak, feel damp or have sharp edges, choose a more suitable container instead. Check the dividers when you tidy the drawer and replace any strip that becomes crushed or frayed. Covering a frequently handled edge with tape can help it stay neat.
The most useful layout is the one that suits what you actually keep in the drawer, not the one that looks most elaborate. A few measured cuts and a quick test fit can turn a spare box into a practical organizer—and leave you with a project small enough to finish in a single free afternoon.